
Contact MeLet's have a Other ways to Support My WorkSubscribe to Insight-Live.com. It is about DIY testing and development, not letting information slip away. Help Me on Social

Login to your online account Chemistry plus physics. Maintain your recipes, test results, firing schedules, pictures, materials, projects, etc. Access your data from any connected device. Import desktop Insight data (and of other products). Group accounts for industry and education. Private accounts for potters. Get started. 
Download for Mac, PC, Linux Interactive glaze chemistry for the desktop. Free (no longer in development but still maintained, M1 Mac version now available). Download here or in the Files panel within your Insight-live.com account. What people have said about Digitalfire
What people have said about Insight-Live
| Monthly Tech-Tip from Tony HansenI will send practical posts like these (from thousands I maintain). No ads or tracking. The first email will provide one-click unsubscribe. Signup is being email-bombed by bots. For now, please subscribe inside your insight-live.com account. BlogThis surprised me about calcia matte glazes:They can be highly melt fluid.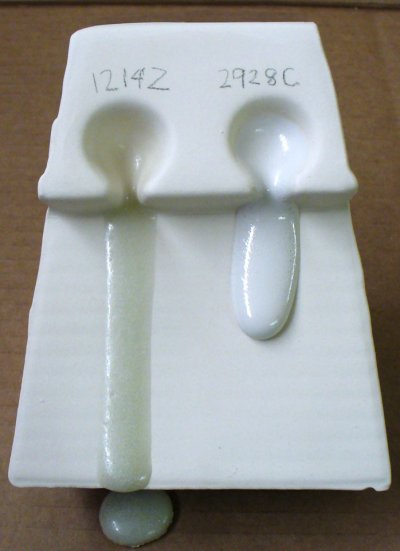
Unfortunately, many matte glazes are such simply because they are not melted enough. That is not the case with cone 6 G1214Z tested here. When applied as a thin layer on pottery, it seems normal. But this GLFL test demonstrates that it fires highly melt fluid, much more than one might expect from a matte glaze. A quick look at its oxide chemistry reveals the reason: It is a calcia matte. It has high CaO, so as the melt cools, it combines with SiO2 and even Al2O3 to form calcium silicate crystals (instead of staying in the glass). Context: G1214Z1, G2928C, Calcia vs Magnesia matte.. Saturday 25th July 2026 Secret #4 of crystalline glazes: They contain little clay.So without help, they don't suspend or harden on drying.
Potters used to working with dipping glazes that contain plenty of clay are shocked when they see what crystal glazers have to work with: Slurries that contain very little clay because the Al2O3 contributed impedes crystal growth. They end up with dipping glazes conditioned with gum and bentonite that are bummers to work with. But here is a way to mix as a gelled brushing glaze that works surprisingly well. This requires two gums. Let's mix 500ml. Context: Fan Brushes - The.., Secret 3 of crystalline.., Glaze large bowls inside-and-out.., Crystalline glazes, Glaze laydown Monday 20th July 2026 Trap a crystalline using a catcher glaze.Stop the crazing using a custom body.
This small vase was quick-cooled so crystals did not grow. But it was fired to the full temperature and held to give the glaze opportunity to run as much as possible. But no "glaze catcher" was needed because I used a "catcher glaze" instead. The upper has a typical high-zinc and high-sodium fritted crystalline glaze. The lower half is just a functional melt-stable cone 6 transparent, G2926B, (having the same amount of cobalt). Notice how it arrests the flow of the runny one. Context: Secret 5 of crystalline.., Crystalline glazes Monday 20th July 2026 A magnesia speckle matte at cone 6 oxidation:The road toward a cone 10R look-a-like is clearer
I am getting closer to reduction speckle in oxidation. I make my own speckle by mixing the body and a glossy glaze 50:50 and adding 10% black stain. Then I slurry it, dry it, fire it in a crucible I make from alumina, crush it by hand and screen it. I am using G2934 cone 6 magnesia matte as the glaze on this mug on the left. To it I added 0.5% minus 20 mesh speck. Right is a cone 10R dolomite matte mug. Next I am going to screen out the smallest specks, switch to a matte glaze when making the specks (they are too shiny here), switch to dark brown stain. Later we will see if the specks need to bleed a little more. The next step is to tune the degree of matteness in the glaze and add a tiny amount of blue stain. I am now pretty well certain I am going to be able to duplicate the reduction look in my oxidation kiln. Methodical testing with good records are the key to fine tuning the color, speckle density and size distribution and glaze surface character. Context: Making your own crucibles.., Reduction speckle a product.., Oxidation fired speckled glaze.., Blue stain in a.., Reduction Speckle, Magnesia Matte Friday 17th July 2026 Permeability of Texas and Montana talcs:Larger round particles vs tiny platelet particles
Texas talc (left) quickly absorbs all the water poured on it. Montana talc (right) resists whetting of the particles much more, the water is just sitting on top and has not penetrated at all. Context: Pioneer 2661 Talc, Talc, Natural Talc C-98, Permeability Wednesday 15th July 2026 Does bisque ware need washing for glazing?These pieces demonstrate why not.
A light coating of ordinary ceramic dust is made of the same minerals as the ware and glaze itself. During dipping, the incoming water instantly penetrates and incorporates surface dust. Glaze are dust mixed with water! However, washing trades a tiny and often harmless surface contaminant for a more serious problem: partially saturated pores. Bisqueware is a porous ceramic sponge. Its job during dip glazing is to suck water out of the slurry quickly and evenly, leaving behind a stable layer of particles on the surface. If the bisque is damp from washing, the suction is weakened. Of course, there are common-sense exceptions, but compressed air, a soft brush, or a barely damp sponge used sparingly are better cleaning solutions to preserve the essential dryness. Context: Should I glaze the.., Bisque, Crawling Sunday 12th July 2026 Fitting a brushing engobe to a porcelain:Three things are very important.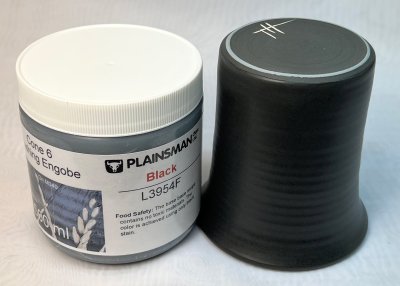
First, the black engobe must be tuned to have the same degree of vitrification as the porcelain (using EBCT test). Second, to brush like a paint onto leather-hard ware, it needs CMC gum. Third, it needs a low water content so one coat covers. Here's how I made a pint: Context: Here s how I.., The best way to.., Is porcelain engobe good.., Engobe Thursday 9th July 2026 Copper is not just a pigment:It can be a powerful flux, with consequences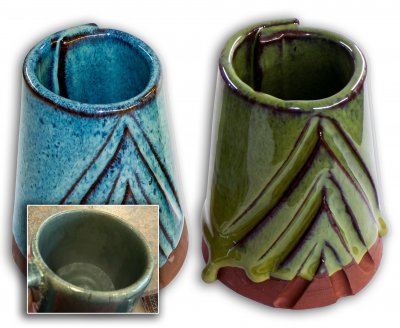
Left: The base recipe of GA6-C (80% Alberta Slip, 20% Frit 3134, 4% rutile). That recipe is stable; it does not run. Right: A 2% addition of copper carbonate transforms it into a runny, melt fluid glaze. It also produces a pleasant green even on this red-burning body (a good green is not easy in oxidation ceramics). Using a catch glaze (e.g. a frit-reduced version), this could be made safe on vertical surfaces. However, there are red flags here. Having only 2% copper would not destabilize a typical glaze (making it leachable). But phase separation is occurring here, likely because the base contains significant rutile. That means the phases are copper-bearing and possibly copper-concentrating. And, as noted, the copper has a greater-than-expected impact on the melt. Third, commercial variegated copper glazes can even leach in acids (as happened with the mug inset after a night with lemon juice). While the GA6-C recipe does have a 0.3:0.7 R2O:RO ratio, other indicators make it a course of wisdom to consider the GLLE test before use on functional surfaces. Context: Copper Oxide Black, CuO, Copper can destabilize a.., Commercial supposedly safe glazes.., Flux Thursday 9th July 2026 Torturous Bacterial Journeys:Courtesy of two Canadian potters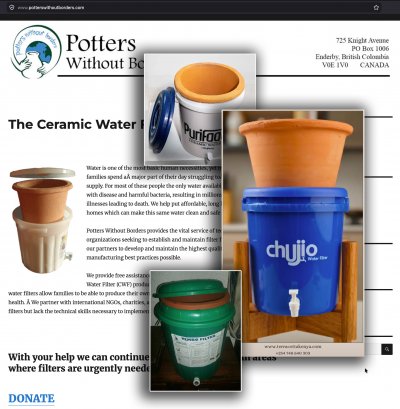
Two potters in the tiny town of Enderby, BC, realized something amazing: Clay is the ideal material from which to make water filters (CWFs). Its internal pore space and structure (and thus filtering efficiency) can be tuned by clay selection, percentage and type of organic combustible and firing temperature. The fired ceramic is also an ideal carrier to host colloidal silver. When optimized, this forces bacteria on a torturous journey that ends in their demise! The result was "Potters Without Borders" and their own journey to facilitate the research, development and commercial application of CWF technology that permits people in developing countries to draw water from unreliable sources. As master organizers and prioritizers, they have enabled factories in Africa, even under sub-optimal conditions, to create teams capable of commercializing the production of these in factories or by local potters. And they have standardized testing to measure capacity and performance. It has been a David and Goliath story of being listened to above the noise from multinationals. Context: Potters Without Borders -.. Tuesday 7th July 2026 Mason ColorA company open with information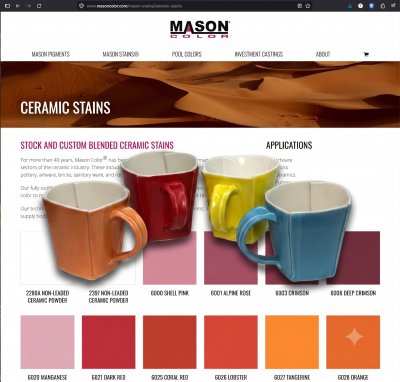
Mason is unusually information-open for the ceramic stain market. Their public reference guide gives compositions by listing oxides such as Co, Cr, Fe, Mn, Ni, Sb, Ti, Zn, Zr, etc., and then marks which oxides are involved in many stain families. It also gives practical compatibility notes, especially about zinc, calcium, firing limits and body-stain use. Their product pages often identify the crystal system/pigment class. For example, Mason 6630 Black is described as a chrome-iron-nickel black spinel formed by high-temperature calcination of chromium, iron and nickel oxides into a spinel matrix. Mason 6274 is described as a nickel silicate green olivine pigment formed from nickel oxide and silica. It is certainly helpful to know if your stain is, for example, a cobalt aluminate spinel, chrome-tin pink, zircon-vanadium blue, nickel silicate/olivine green, rutile yellow, etc. Mason’s technical table also lists CICP/color-index numbers, CAS numbers, chemical names, specific gravity, oil absorption, mesh residue and pH for some pigment lines. Of course, they don't publish oxide percentages, mineralizers, firing schedule, milling procedure, soluble salts, frit additions, trace impurities or batch tolerances. This being said, they are not completely alone; some others also publish such information. Context: , Ceramic Stain Tuesday 7th July 2026 |


https://digitalfire.com, All Rights Reserved
Privacy Policy